The exposure triangle
Three controls decide how much light ends up in the photo: aperture, shutter speed and ISO. Each one also has a side effect, and that’s where creative choices come from.
1Simulator
Expose the photo
Turn the three dials until the light meter, the indicator that tells you whether the photo is too bright or too dark, reads zero. Then find the same light with different combinations and see what changes in the background, in the running person and in the grain.
In real life
 Back to Simulator 1
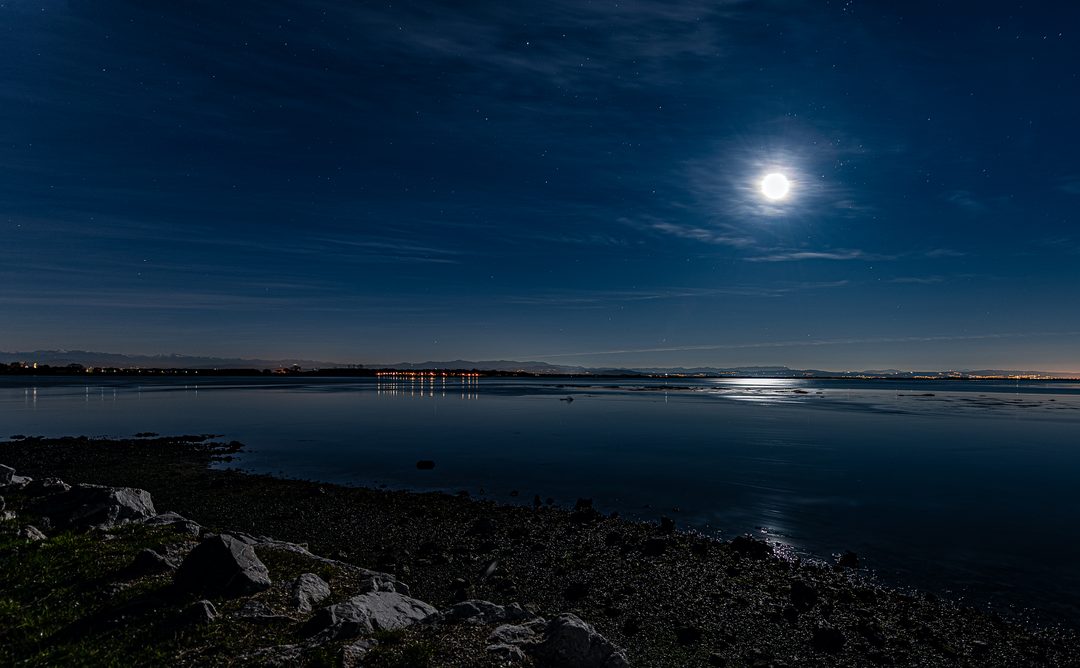
Grado lagoon At night, on a tripod: 25 seconds at f/2.8 let in enough light to keep ISO at 100.
14-24 mm f/2.8 · tripod
The three controls
1 Simulator The aperture is the opening in the lens that lets the light through. It’s written as f/ followed by a number, and the number works backwards: small number, big opening. The bigger the opening, the more light comes in and the more the background melts away.
The shutter speed is how long the shutter stays open, almost always in fractions of a second. A fast speed, like 1/1000, freezes motion; a slow one, like 1/15, turns it into a trail.
ISO is like the volume knob on an amplifier: it boosts the sensor’s signal and the photo gets brighter, but along with the signal it boosts the hiss too, that is, the noise, the grain.
How to choose: first the control that matters for your photo (the aperture if you care about background blur, the shutter speed if you care about motion), then the other one, and ISO last, only as much as you need.
What a stop is
1 Simulator A stop is the step we use to count light, and it’s always a doubling: +1 stop means twice the light, −1 stop half. Two stops are four times as much, three stops eight times.
Each control has its own stops. Shutter speed: from 1/250 to 1/125 the sensor is exposed for twice as long, +1 stop. ISO: from 400 to 800 the signal doubles, +1 stop. The aperture, on the other hand, follows a series to learn by heart: f/1.4 · f/2 · f/2.8 · f/4 · f/5.6 · f/8 · f/11 · f/16. Each step to the left lets in twice the light: +1 stop.
That’s why you can swap one stop for another and the photo stays just as bright: f/2.8 at 1/250 gives the same light as f/4 at 1/125. In the simulator each click of the dials is one stop; on real cameras the dials usually move in thirds of a stop: three clicks make one stop.
Key points
- One stop = twice or half the light. One stop of shutter speed, one of aperture and one of ISO are equivalent.
- Wide aperture (f/1.8) = more light and a blurred background. Narrow aperture (f/16) = less light and more in focus.
- Fast shutter speed (1/1000) = motion frozen. Slow shutter speed (1/15) = motion blurred and, handheld, the whole photo shaken.
- High ISO = a brighter photo but more grain. Raise it after choosing aperture and shutter speed.
Try it yourself
Photograph the same subject three times with the same exposure: once with a wide aperture, once with a narrow aperture, once with a slow shutter speed. An Android smartphone in Pro mode works too, or an iPhone with an app that lets you set shutter speed and ISO.
Post the result and tag me @enrico.marega, or send it to me by DM: I’d love to see how you tackled it.
Quick check

Was this useful?
Follow me on Instagram: under every photo I post you’ll find the shooting settings, so you can see these lessons at work on the street. On YouTube you’ll find short videos.
Got a question about this lesson? Send me a DM on Instagram.